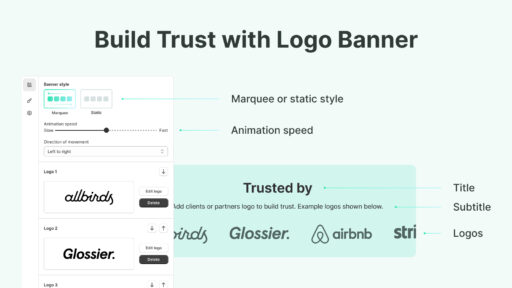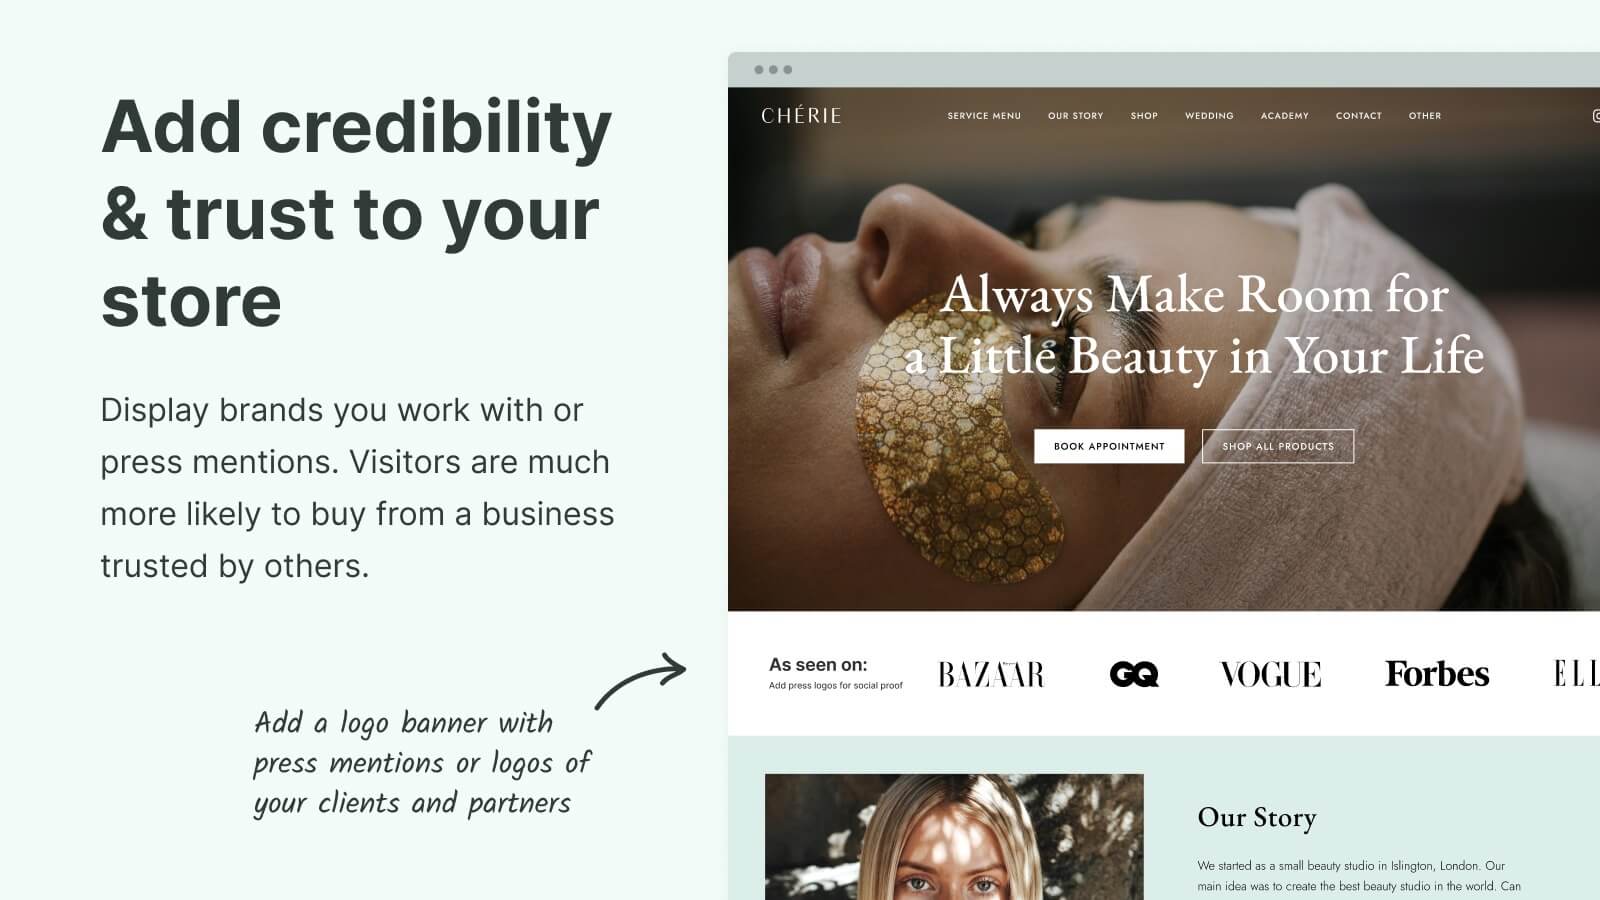
Every Shopify merchant wants to build trust quickly. Shoppers make snap decisions, and one of the fastest ways to show credibility is by displaying recognizable brand logos. A logo slider banner is the perfect tool for this. It’s more than just design — it’s a visual trust signal that can increase engagement and improve conversions.
Why Your Shopify Store Needs a Logo Slider Banner
A logo slider banner is a simple section that scrolls through partner logos, client logos, or press mentions. Instead of taking up lots of space with a grid, the slider keeps things compact and visually appealing.
Here’s why it matters:
- Instant trust: Customers recognize well-known logos and feel more confident in your brand.
- Space-saving design: You can display many logos in one neat section without cluttering your page.
- Mobile-friendly experience: Sliders look clean on smartphones, where vertical space is limited.
- Engagement booster: Moving elements naturally catch the eye and encourage visitors to stay longer.
For any Shopify store that wants to appear more professional and trustworthy, adding a logo slider banner is almost a must-have.
Step by Step Tutorial: How to Add a Logo Slider Banner in Shopify
The good news is you don’t need coding skills. You can add a logo slider banner in just a few steps using an app like Fab Scrolling Logo.
Step 1: Collect and Format Your Logos
Before you start building the banner, gather the logos you want to display. The format you choose will affect how crisp and clean they look on your website:
- SVG (best option): Vector-based, sharp on any screen size, and future-proof for high-resolution devices.
- PNG: Ideal for logos with transparent backgrounds. Works well if SVG isn’t available.
- JPEG: Acceptable for simple graphics, but not recommended since it doesn’t support transparency.
Try to use SVG whenever possible. That way, your banner will look professional across all devices.
Step 2: Install Fab Scrolling Logo Showcase app
Next, go to the Shopify App Store and install the Fab Scrolling Logo Showcase app. This tool takes care of all the technical details and lets you create banners through a simple interface.
Highlights of the app:
- Supports SVG, PNG, and JPEG formats
- Intuitive, no coding required
- Optimized for mobile and desktop
- Fast setup
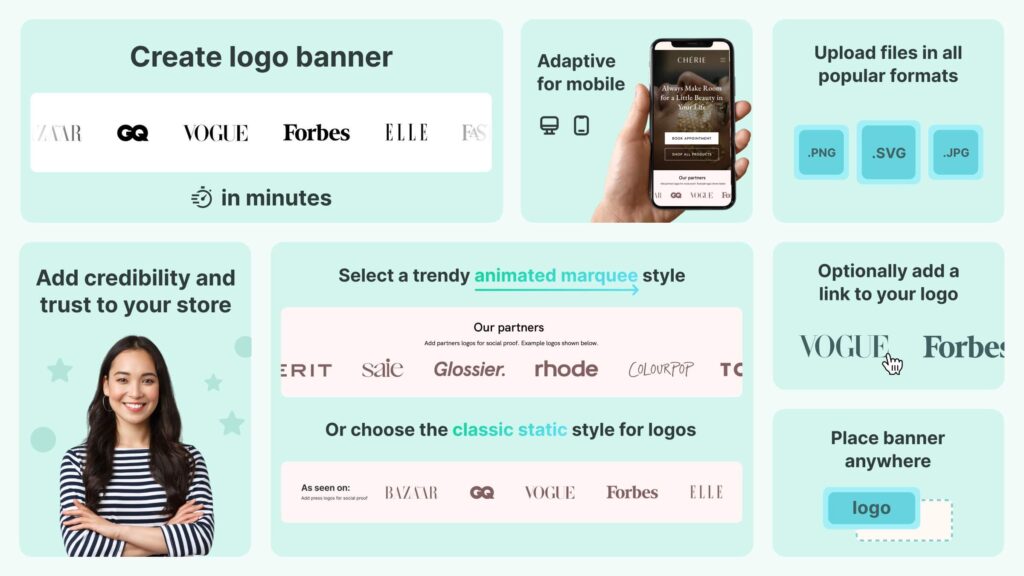
Once it’s installed, you’ll be ready to start building your banner.
Step 3: Build Your Scrolling Logo Banner
Inside the app dashboard:
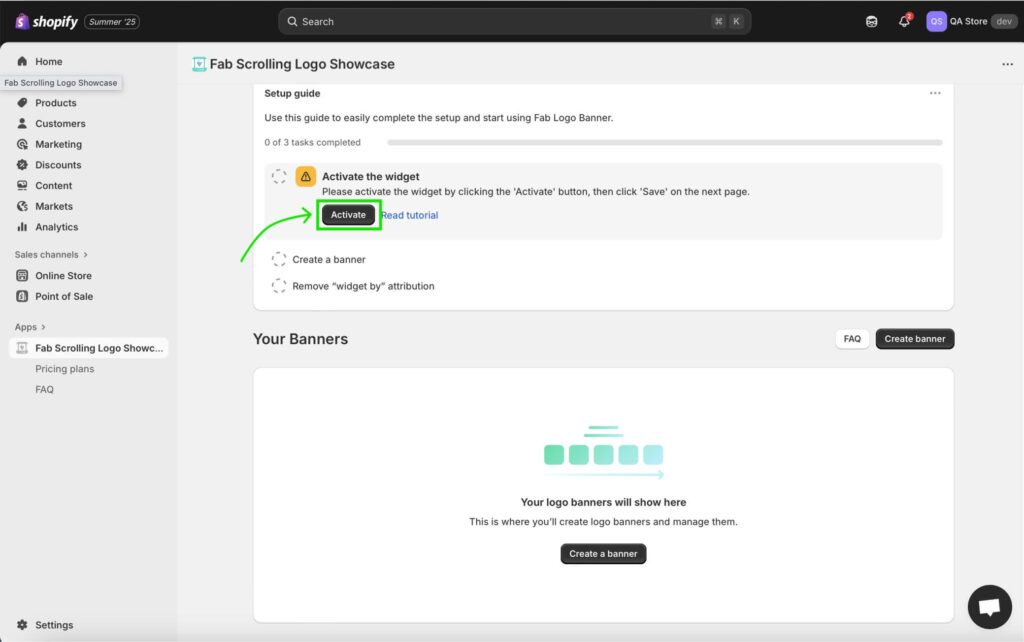
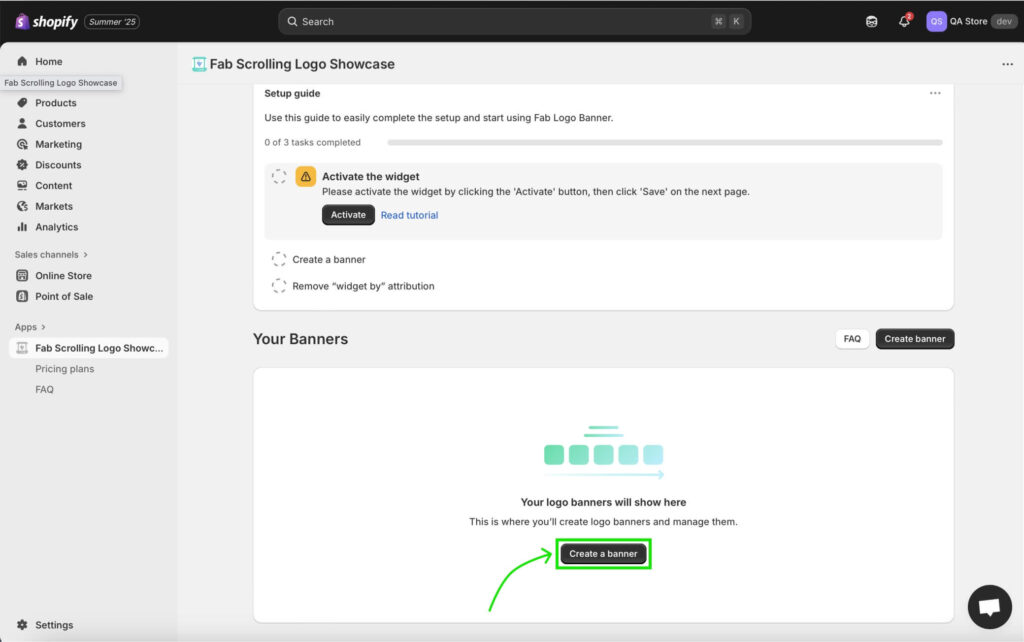
1: Activate the Widget
Start by activating the widget inside the app. In the setup guide, click the Activate button. This will redirect you to your Shopify store settings. Simply hit Save there, and then return to the app dashboard.
2: Create a New Banner
Next, click on the Create a Banner button.
A window will appear, giving you two style options:
- Marquee (scrolling style): A dynamic, moving banner that continuously scrolls your logos.
- Static Grid: A simple, stationary layout where all logos are displayed at once.
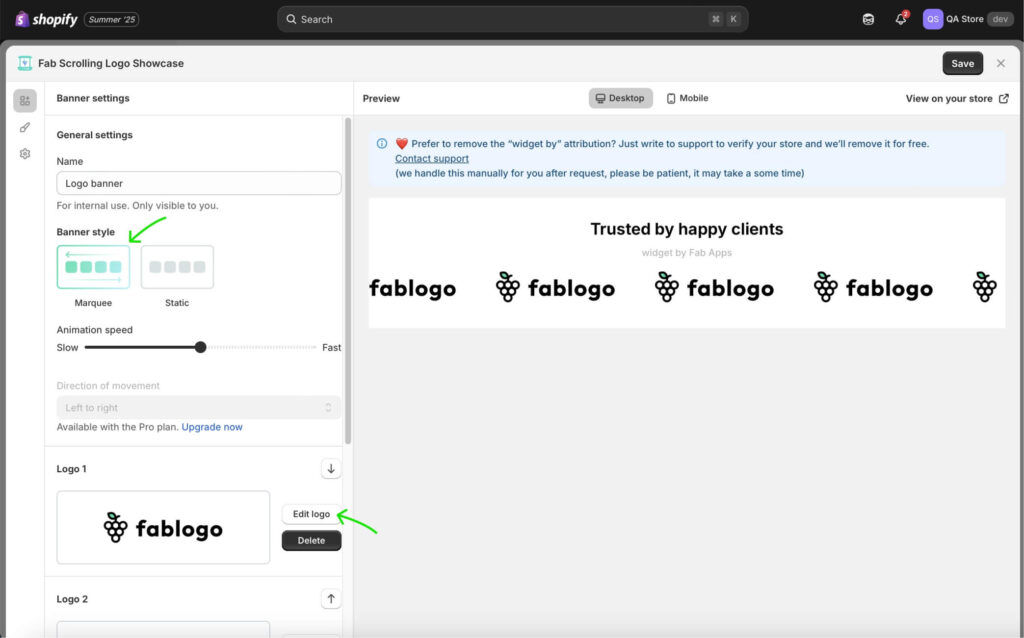
You’ll notice placeholder logos already in place. You can either remove them or click Edit to replace them with your own uploads. On the same screen, you’ll also find options to customize the banner further. Here, you can add a title and a subtitle to give context to your logos, for example, “Our Partners” or “As Seen In.” This is a great way to introduce the banner and make it more meaningful for your visitors.
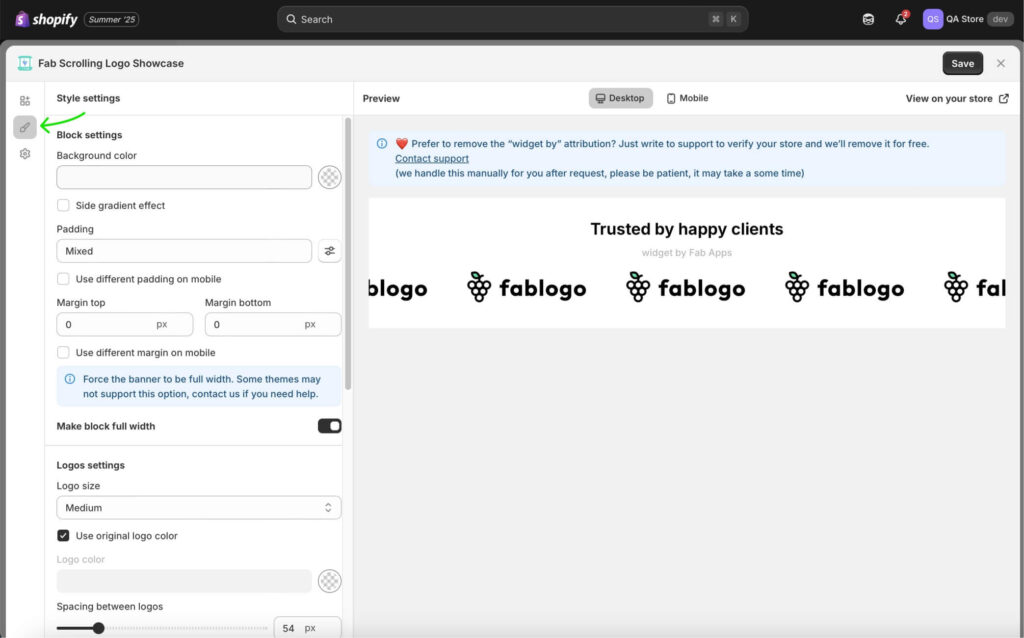
In the Style settings (second icon on the left sidebar), you can adjust the banner’s look by changing the background color, logos size, controlling the spacing between them, etc. This helps the banner match your store’s design more seamlessly.
Step 3: Place the Scrolling Logo Banner on Your Store
To publish your banner, go to the Placement tab and click Save.
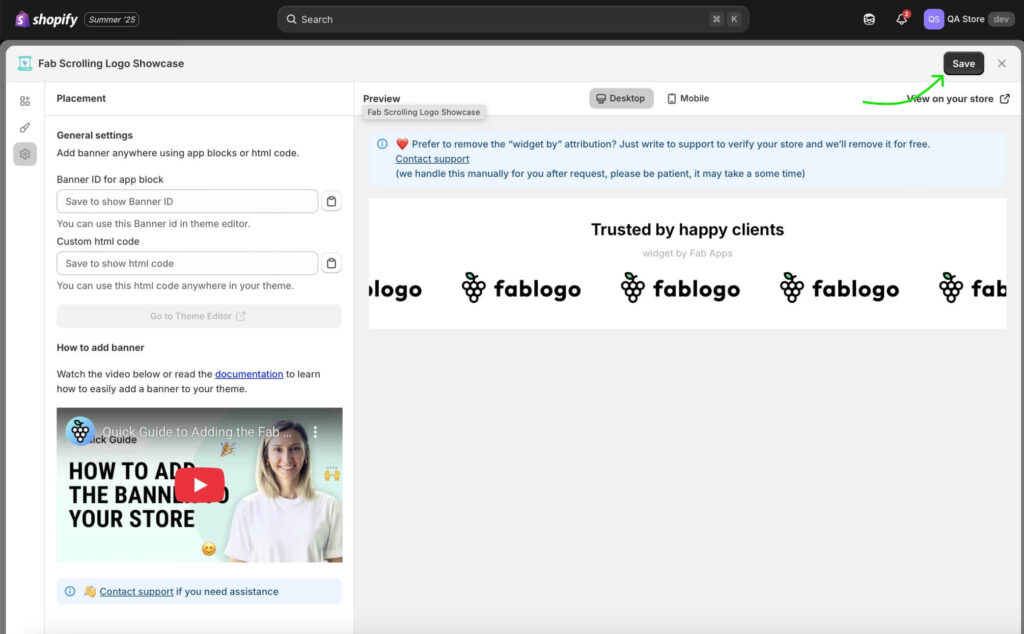
After saving, the app will generate a unique Banner ID for the block. Copy this ID, then click Go to Theme Editor.
You’ll be redirected to your Shopify store where the app’s widget section will already be added.
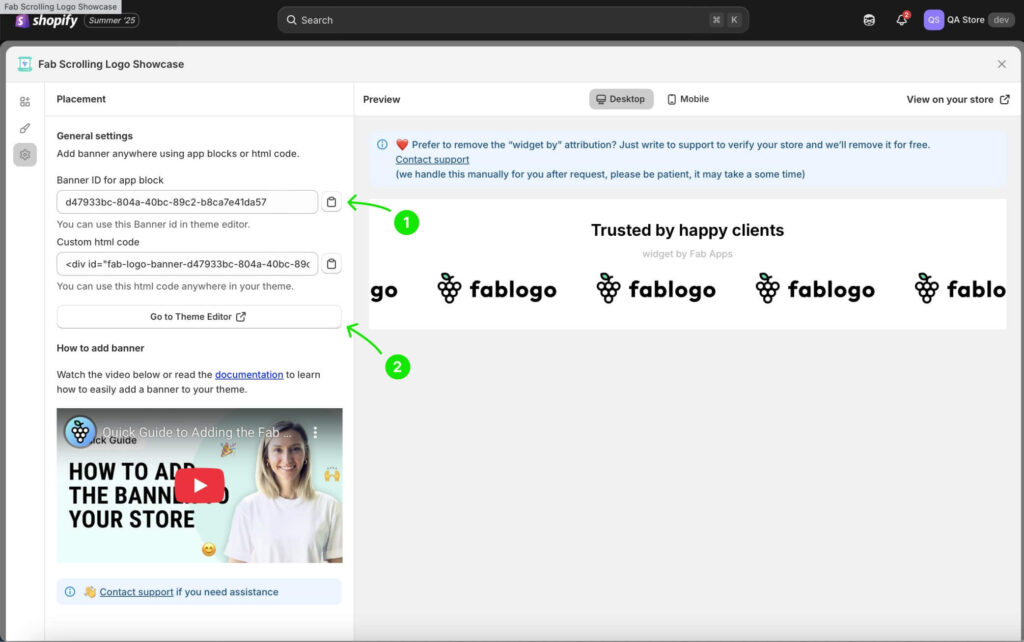
Open the widget settings, paste the copied Banner ID into the designated field, and save your changes.
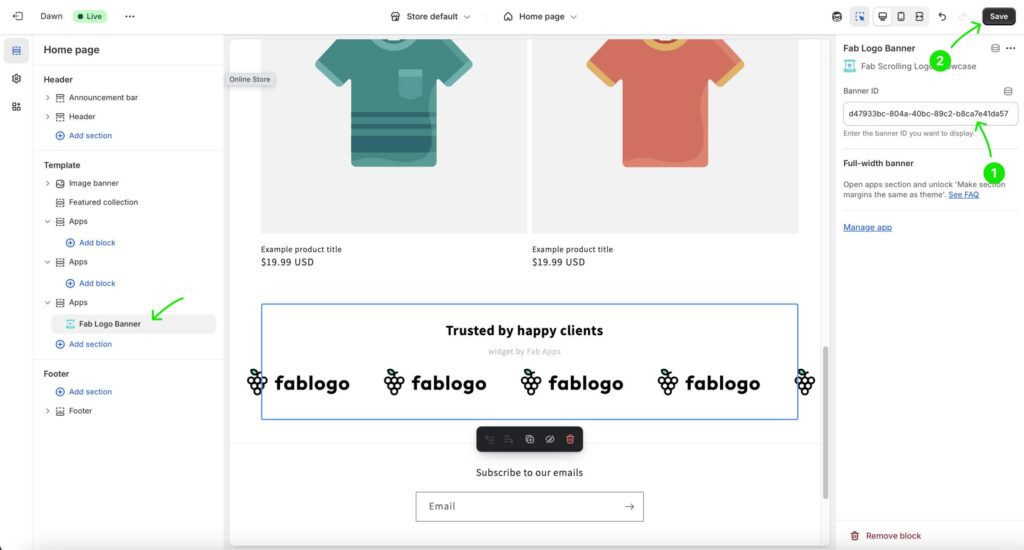
That’s it, your scrolling logo banner is now live on your Shopify store. Great job! You can also choose which page to display the banner on, move the widget to the spot that works best (most stores place it right after the hero image), and even create multiple banners to showcase different logos.
Final Thoughts
A logo slider banner is not just a design feature, it’s a business asset. It builds trust, saves space, and enhances the look of your Shopify store. By following the simple step-by-step process above, you can add one in minutes and immediately elevate your brand presentation.
For merchants looking for the easiest and most flexible option, Fab Scrolling Logo makes it seamless to create both logo sliders and static showcase banners, ensuring your store looks polished and trustworthy from the first impression.
👉 App link: Fab Scrolling Logo app
💡 Read How to add a scrolling logos banner in Shopify? 2 min tutorial.

